Thursday, November 13, 2008

Finding The Best Tripods and Mounts For Your Binoculars

by Derek Robinson

Many mounts are available for all your birdwatching and astronomy needs, and options vary widely to accommodate the particular optical device you use. Inevitably, selecting the right mount or tripod means finding a compromise between weight, size, and stability. While stronger, heavier mounts will obviously provide more strength for larger sets, some trades are made in terms of convenience and portability.

Bushnell offers a number of binocular accessories including tripods which come in a wide range of price points and specialties. While some are meant to be mounted on a table, others are best placed on the ground. There are even car window mounts for when you don't want to leave the vehicle. Their table top tripod is only 9 inches tall, with a weight of only 1 lb, and a price less then $20. This could be an excellent Christmas gift for that friend who has everything, and can easily be placed on a patio table or picnic table for convenient, portable outside use.

Field tripods are larger, and while you want to keep them reasonable for carrying, they also tend to offer a little more strength for larger spotting scopes and binoculars. For example, Bushnell binoculars field tripods offers a maximum height of only 3 feet, although it has three leg sections so you can adjust it to the height you need up to those 3 feet. It still weights in at only 1 lb, and is a birdwatcher's favorite for portability and strength. At less than $60 it is also another great option for Christmas gift-giving.

Apart from size, smooth operating tripod heads are a necessity for birdwatching. You just don't want to be fighting to turn the head around the right way when that rare bird appears, so it's important to have a reliable head that will move smoothly. It will also be worth it to spend some time working with the head in advance to determine it's range of movement and how best to manipulate it while keeping it in control. That way you won't be wildly whipping it around to catch that endangered raptor, hoping to get it set up properly before it's too late.

If you use more than one set of binoculars or other optical devices, there are mount adapters available that allow you to use any set of binoculars of any brand on your existing mount. In using one, you can quickly and easily set your binoculars on a tripod even when you usually use them in-hand. If you have giant lenses this would be particularly useful when you want to survey a large area while birdwatching over extended periods. It could also be useful for hunters who want to set up camp and watch moving herds at dusk, and those who may use their existing night vision binoculars for surveillance during neighborhood watch.

Some mounts for astronomical purpose add even more exciting features. While these can improve your experience considerably, naturally they add weight and size and may only be reasonable when you plan to set up a scope that can be left in place. These mounts are usually bigger and heavier, and may be used on your patio or even if you just plan to set them up in one spot and leave them there for the night. For example, Oberwerk binoculars offer a mirror mount for giant binoculars used to stargaze. This sets up more like a microscope, as you mount the binoculars so they point at the mirror. The night sky is reflected in the mirror then up through the binoculars. Ultimately you end up looking down diagonally, rather than up through the binoculars. For some this angle is much more comfortable, particularly with telescope binoculars or giant binoculars. These larger optical devices can be uncomfortable to use when pointed diagonally up rather than down. When you're using them for long periods of time, the right mounting device certainly enhance your comfort.

That said, you will want to be careful handling such mounts, not only because they are heavy, but because the added glass can be fragile. You wouldn't want to drop one of these mounts once you have invested in one. With a price range of about $170-220, this can be a great option, provided you have a deck or other permanent mounting area.

While choosing mounts takes a little extra time, and certainly incurs some added investment, it can be a big difference towards enjoying birdwatching or stargazing. Nobody wants to end up with a neck or arm ache from holding optical devices up, nor from struggling to keep binoculars trained on an image. Do take the extra time to consider your mount options, as it can help you gain hours of enjoyment with your giant binoculars, night vision binoculars, or rangefinders.

About the Author

Derek Robinson is a keen outdoorsman who contributes regularly for many websites including The Binocular Site which is the premier consumer site about binoculars, monoculars, spotting scopes and much more at http://www.thebinocularsite.com

Step-by-Step Guide to Increase IQ

Friday, October 31, 2008

How Do Telescopes Work - Telescope Lenses

by John B. Mayall

Lenses and mirrors are the elements used to collect and view focused light in telescopes. Mirrors are the medium for focusing in reflector telescopes, while lenses are the medium in refractors. Each type has its own distinct advantages and disadvantages. Refractor type telescopes use lenses. These lenses bend the light when it enters the telescope from the distant object being viewed through it. Because of this refraction it is possible to closely view a distant object. The telescope has two lenses, with one slightly larger.

The eyepiece in the telescope is generally a small lens. Some telescope however, may not use lenses for the eyepiece at all. The eyepiece, in any case, is the most important element of a telescope. It is the element which lets you see correctly whatever it is that you want to focus on. These eyepieces are adjustable and are of a low power. Adjusting the eyepiece allows you to change the magnification factor. What kind of lens you use for the eyepiece is a personal choice. In today's age, several different kinds of eyepieces are available in the market. Because of this motley available, choosing the correct eyepiece fro your requirement may be a difficult task. As a result, you should concentrate on defining the criteria you think are important for your choice. The depth of field, optical quality, sharpness, clarity, brightness, market price, barrel size and how it affects your eyesight are some of the major points of concern. However these criteria always remain individual prerogatives.

Lens designs used in older telescopes go by the name of Huygens and Ramsden. Professional astronomers are advised to not use these lenses anymore as they are not of superior quality, even though they are comparatively less expensive than other market lenses. These lenses also do not provide correction for chromatic aberration or the light circles that form around brighter objects when they are viewed.

Professional astronomers use orthoscopic lenses that are designed specifically for professional stargazing. Even amateurs will find these lenses good for their telescopes. The orthoscopic telescopes use four lenses in the eyepiece, and have a 45 degree field of vision (FOV). Since the eyepiece is the element most important to the quality of a telescope, this design is a winner. The lenses do not strain the user's eyes, and can be used even for viewing closer objects like planets.

For a person with a moderate budget, a Barlow lens is a viable option. The design provides average quality but is a good bargain. It does not burn a hole in one's pocket, and yet is not of inferior quality because of its cost. The range at which this lens is available starts at a low $30 and goes up to $70. The magnification factor is generally not enough for professional use, however for amateurs it should be enough. For hobbyists, it is an ideal lens.

When you're looking for lenses for a telescope, it is important that you determine criteria that most comprehensively fulfill your needs from the lens. Adjustable lenses is a good option as it means you can view objects which are not too far, as well as distant stars with it, and thus obtain the best deal your money can buy you.

About the Author

Download free hubble image space telescope as well as learning more about refractor vs reflector telescopes when you visit http://www.howdotelescopeswork.com, the online portal for free resource on telescopes making and usage

Step-by-Step Guide to Increase IQ

Sunday, October 26, 2008

Illinois - Adler Planetarium - A Great Vacation and Travel Destination

by Robert W. Benjamin

Do you like looking at the stars? If so, and you plan on passing through Illinois, you must stop at the Adler Planetarium. This Planetarium is amazing and it really does have something for everyone. One of the greatest parts about it is there are free daily activities that everyone can enjoy.

There are many different activities that may take place and they do change from time to time. Some of them include hands on science challenges, while others include tours of new exhibits. There are also computer activities, interactive demonstrations, astronomy crafts, and telescope viewing. There are some great activities for kids as young as three, all the way up to adulthood.

Check out how craters are formed and how space rocks impact the earth. Or, check out how gravity works and then move on to the create a comet demonstration. Some people like the cosmic ray detectives class while others enjoy learning more about auroras.

The planetarium is open from Sunday through Saturday from 9:30 am until 4:30 pm. The first Friday of every month has later hours until 10 pm. The holiday schedule changes so it is important to check out the times to know when to visit. The planetarium is always closed on Thanksgiving Day and Christmas Day. During the summer months, there are extended hours as well.

The Adler Planetarium sells tickets only from the box office on a first come first serve basis. For adults the general admission is $10 for exhibits only, $19 for admission and a show, and $23 for admission and two shows. Prices for Chicago residents are two dollars less per package. Kids pay $6 for general admission, $15 for admission and a show, and $19 for two shows in addition to admission. Learn more about space and have fun as an entire family by visiting the Adler Planetarium. It is affordable and has great hours, so make a plan to check it out when you are visiting Illinois.

There is a website that has great information on USA Vacations and Unique Travel Spots Listed State By State and Season, the website is called: Seasonal Vacation Spots, and can be found at this url: http://www.seasonalvacationspots.com

By Robert W. Benjamin

You may publish this article in your ezine, newsletter, or on your web site as long as it is reprinted in its entirety and without modification except for formatting needs or grammar corrections.

About the Author

Robert W. Benjamin has been in the software business on the Internet for over 8 years, and has been producing low-cost software for numerous years. He first released public domain products on the AMIGA and C64 computer systems in the late 1970s-80s.

RC Helicopters World

http://www.rchelicoptersworld.com

Step-by-Step Guide to Increase IQ

Friday, October 17, 2008

Black Hole Facts

by Roger Smith

If you are into science, astronomy or even science fiction, you probably are amazed at the phenomenon called black holes. Black holes by their very name convey mystery and intrigue and while man has theorized about the existence of black holes since the late 1700's, we are still a long way off to knowing precisely what black holes are and how they behave today.

What is a Black Hole? One of the questions most people have about black holes is exactly what they are. Black holes are theorized to be areas of space in which the gravitational field is so strong and powerful that nothing can escape and break passed its grasp. In fact, black holes show up as completely void areas of space, because not even light can escape the strong gravitational forces. It is believed that a black hole is caused by a large star imploding onto itself creating tremendous density and thus incredibly strong gravitation forces.

The Life of a Black Hole Black holes as stated above are caused by a large star- much larger than our own sun imploding. These large stars run out of fuel which is necessary for nuclear reaction. Unfortunately, as the star runs out of fuel, the effect of normally pushing energy out is outweighed by its own gravity which continues to grow exponentially until the star incredibly crushes itself. It crushes itself to such a degree that its mass becomes super dense creating incredible forces of gravity that do not let anything escape its force. It should be noted that a black hole does not last for ever, while it does not allow light to escape, x-ray radiation is emitted and eventually black holes become smaller and smaller till eventually they disappear.

Where are Black Holes Located? One of the most noticeable aspects of black holes is that they usually can be easily located due to the fact that they are completely void areas of space. Black holes have been located throughout our universe in several galaxies. It was theorized that there was even a black hole in our galaxy- the Milky Way, however for a long period of time the evidence was not complete. Recently however, a black hole was discovered in our own galaxy- actually in the center turning many astronomers' theories on their heads.

For more information regarding black holes, the Smithsonian Magazine has a fascinating article on the subject. To read it, please visit our main website.

About the Author

http://www.smithsonianmag.com Smithsonian magazine is a monthly magazine created for modern, well-rounded individuals with diverse interests. It chronicles the arts, history, sciences and popular culture of the times. Each month, expect articles from the Smithsonian Institution's award-winning, monthly general interest magazine, plus exclusive Web articles, videos, blogs, photographs and more.

Step-by-Step Guide to Increase IQ

Naming Stars in Different Cultures

by Richard Pickering

While modern astronomers refer to most stars solely by catalog numbers and astronomy coordinates, many people informally name stars using name a star services. In fact, throughout history people from various cultures have used star names of their own choosing. Many civilizations explained their existence through mythological stories passed from generation to generation, and often associated these stories with the stars in the night sky. As we'll see, even a major car company is named after the stars.

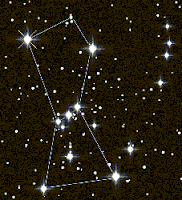
To illustrate, let's start with a constellation (an area of the night sky) modern astronomers have named after a character from Greek and Roman mythology - "Orion," the Great Hunter. Orion is one of the most well known and easily-identifiable constellations, and can be seen from just about anywhere on Earth: The best time to view Orion is during the evening hours between roughly December and March. Many classical mythology stories are told about Orion and how he came to be placed in the heavens. One such story is that Orion had no fear of any animal and therefore threatened to exterminate all of the animals of the earth. When Gaia, the goddess of the earth, heard this she became enraged and sent a scorpion to kill Orion. When Orion encountered the scorpion he was unable to kill it, and the scorpion stung Orion and sent him falling to the earth, fatally wounded. In honor of this story, Orion was placed in the night sky as a constellation, as was the scorpion - known as the constellation "Scorpius."

While 21st century astronomers refer to the constellation "Orion" after a hunter from classical mythology, other cultures have had different interpretations of these same stars. One of the distinguishing features of Orion is a line of three, bright stars that form what is called "The Belt of Orion." The ancient Egyptians thought these three bright stars were the resting place of the god Osiris. The Dogon people of West Africa viewed the three stars as the stairway to heaven. These same three stars have been associated with Christmas, viewed as representing the Magi - "The Three Wise Men" (The Three Kings) from the Bible. The people of the Marshall Islands viewed Orion's stars as an octopus and a fisherman: The story told was of a fisherman who was attacked by an octopus. The fisherman defended himself by using a stone to stab the head of the octopus. Although the octopus was wounded he was able to spray his ink, behind which he hid and was able to escape. The Chimu Indians of Peru believed that the middle star of Orion's belt represented a thief or mischief maker that the Moon Goddess punished. The Moon Goddess punished the wrongdoer by sending two stars to capture him and send him to four vultures that would eat him. This mythological story served as a warning for those who would commit crimes.

Another interesting example from classical mythology is related to a beautiful group of stars in the constellation Taurus called "The Pleiades," or "The Seven Sisters." These stars are visible in the evening sky from roughly November through April, and are often confused with "The Little Dipper" (which is in another constellation) as the bright stars of the Pleiades together resemble a very small dipper, or ladle. The story from classical mythology is that Orion, the hunter, became enamored of these seven beautiful ladies, and relentlessly pursued them throughout the world. Taking pity on the young women, Zeus placed them in the heavens where Orion continues to pursue them in the night sky.

Many cultures have also associated the Pleiades with females or femininity. The Australian Aborigines saw this group of stars as a cluster of girls who were musicians. These girls play their instruments for a group of young boys who are represented by the stars seen in Orion's belt. Some Native American tribes viewed the Pleiades as seven mothers who were looking for their seven lost sons: According to the Chumash Indians of California, these seven sons had become the stars of the Big Dipper. The Kiowa Indians saw these stars as young women who were placed in the heavens by the Great Spirit so as to save them from attacking bears. In Norse mythology, they were the hens of Freya, the goddess of love, beauty and fertility. In Japan the Pleiades were known as "Subaru," after which a Japanese car company is named.

Naming stars, then, is an age-old custom that has been practiced by different civilizations around the world.

About the Author

Richard Pickering is an astronomer for Name A Star Live. While no star-naming service can change the scientific designations of stars, only Name A Star Live makes it real by providing you: Virtual Planetarium™ astronomy software; an opportunity to view your star live using an online telescope; and the launch of your star name into space!

Step-by-Step Guide to Increase IQ

Sunday, September 28, 2008

Going to the Planets with Your Eyes and Imagination

by Jeff Seward

A good way to teach your kids their first lesson about the eight or nine (depending on how you wish to tell them about Pluto) planets of the solar system is by combining factual lessons with visible sightings of the planets.

How to Teach Your Kids about Planets

START BY DISTINGUISHING PLANETS FROM STARS; this will also help them understand better why planets are easier to identify among the thousands of stars in the sky if they know what they're looking for. This may also be a good time to start explaining to them why Pluto, once known as the 9th planet in the solar system, has been demoted to becoming a dwarf star.

YOU CAN MAKE LESSONS MORE INTERESTING by providing explanations behind the stories of the planets' names. This makes a great segue from astronomy to Greek and Roman mythology.

IT IS IMPOSSIBLE to see all eight planets in one night so consider dividing your home astronomy lessons into several sessions.

SHOW YOUR KIDS A PHOTO OF OUR EARTH and explain to them why our planet is livable compared to other planets in the solar system. If possible, enumerate the factors that make Earth inhabitable. This is also a good time to explain why scientists believe there's a chance for Mars to have once been inhabited and the theory of aliens.

VENUS is the closest planet to Earth and is the easiest planet to locate with the naked eye because of its brightness. Although the phases of Venus can only be visible through the use of a telescope, you could show photos that will give your kids a good idea about the dangers of the greenhouse effect and emphasize to them the importance of keeping the environment clean.

JUPITER is the next easiest planet to locate with the naked eye because of its size. Make sure, therefore, that you mention to your kids how Jupiter is the largest planet in the solar system. If you have a small telescope with you, you can also point out to them where the Red Spot of the planet is and how it's actually a storm that has been brewing for more than three centuries. This is a good time to explain the differences in Jupiter's and Earth's weather and why we're blessed to have weather like ours.

MARS can be easily located as well because of its distinctive coloring. You can elaborate on what you've discussed earlier on by enumerating the similarities between Mars and Earth.

MERCURY is the closest planet to the Sun, and you can explain why its location or proximity to the center of the solar system makes it difficult to locate at certain times of the day. You can also provide explanations as to why Mercury's weather is extremely hot and cold at day and night respectively before citing the possibility of having the same thing happen to Earth.

ALTHOUGH SATURN IS NOT THE ONLY PLANET IN THE SOLAR SYSTEM WITH RINGS, it is however the most famous. Saturn will appear yellowish to the naked eye but its rings will only be visible with the help of a telescope. If you can show your kids what the rings look like, you can then explain to them what these rings are made of.

URANUS can only be seen by the naked eye if it's shining at its brightest. You will also have to be an optimal place and time. If you're living in a city, you might need the help of a telescope to give your kids a better and clearer view of this planet.

NEPTUNE is the most difficult planet to locate by the naked eye and conditions have to be near perfect first before this can be possible. Together with Uranus, both planets require you to study planetary schedules and locations if you wish to locate them at the shortest amount of time and effort.

And lastly, if you still have time and you do own a telescope, you can also show your kids Pluto. As Pluto is named after the God of the Dead, you might want to cite similarities between the mythical god and its equivalent planet. Explain about the controversy revolving the demotion of Planet.

And there ends your first home astronomy lesson for your kids. Prepare lots of food for the session because this makes a great bonding time for your family as well.

About the Author

Learn about Sun facts and Jupiter facts at the Planet Facts site.

Step-by-Step Guide to Increase IQ

Wednesday, September 17, 2008

How To Moon Gaze

by Jeff Seward

For many of us, our very first experience of learning about the celestial bodies begins when we saw our first full moon in the sky. It is truly a magnificent view even to the naked eye. If the night is clear, you can see amazing detail of the lunar surface just star gazing on in your back yard.

Naturally, as you grow in your love of astronomy, you will find many celestial bodies fascinating. But the moon may always be our first love because is the one far away space object that has the unique distinction of flying close to the earth and upon which man has walked.

Your study of the moon, like anything else, can go from the simple to the very complex. To gaze at the moon with the naked eye, making yourself familiar with the lunar map will help you pick out the seas, craters and other geographic phenomenon that others have already mapped to make your study more enjoyable. Moon maps can be had from any astronomy shop or online and they are well worth the investment.

The best time to view the moon, obviously, is at night when there are few clouds and the weather is accommodating for a long and lasting study. The first quarter yields the greatest detail of study. And don't be fooled but the blotting out of part of the moon when it is not in full moon stage. The phenomenon known as "earthshine" gives you the ability to see the darkened part of the moon with some detail as well, even if the moon is only at quarter or half display.

To kick it up a notch, a good pair of binoculars can do wonders for the detail you will see on the lunar surface. For best results, get a good wide field in the binocular settings so you can take in the lunar landscape in all its beauty. And because it is almost impossible to hold the binoculars still for the length of time you will want to gaze at this magnificent body in space, you may want to add to your equipment arsenal a good tripod that you can affix the binoculars to so you can study the moon in comfort and with a stable viewing platform.

Of course, to take your moon worship to the ultimate, stepping your equipment up to a good starter telescope will give you the most stunning detail of the lunar surface. With each of these upgrades your knowledge and the depth and scope of what you will be able to see will improve geometrically. For many amateur astronomers, we sometimes cannot get enough of what we can see on this our closest space object.

To take it to a natural next level, you may want to take advantage of partnerships with other astronomers or by visiting one of the truly great telescopes that have been set up by professionals who have invested in better techniques for eliminating atmospheric interference to see the moon even better. The internet can give you access to the Hubble and many of the huge telescopes that are pointed at the moon all the time. Further, many astronomy clubs are working on ways to combine multiple telescopes, carefully synchronized with computers for the best view of the lunar landscape.

Becoming part of the society of devoted amateur astronomers will give you access to these organized efforts to reach new levels in our ability to study the Earth's moon. And it will give you peers and friends who share your passion for astronomy and who can share their experience and areas of expertise as you seek to find where you might look next in the huge night sky, at the moon and beyond it in your quest for knowledge about the seemingly endless universe above us.

About the Author

To learn facts about Earth and facts about Saturn, visit the Planet Facts website.

Step-by-Step Guide to Increase IQ

Saturday, August 23, 2008

How To Use a Telescope - Comprehensive Telescope Kits

by John B. Mayall

For the budding stargazer, the most important instrument in his inventory should be a telescope. Once this debate is resolved, the next question is where to source this all important instrument from. You can work from scratch, buy all the raw material required, and build your own telescope, or you can take the easier and more practical way out and buy yourself a telescope kit which contains every last thing you will need to make you telescope and then just assemble the supplies together. It is the telescope kit that is the recommended option for a beginner. Ideally, only professional should attempt to build a telescope out of practically nothing. Telescope kits not only come with everything you need to build a good telescope, they also contain a descriptive instruction manual that will lead you through each step of the telescope construction process.

The commonly available kits have the elements and the guides for making a Dobsonian telescope. This telescope uses a secondary mirror in addition to a primary mirror. The other optical constituents of this telescope are a finder scope, an eye piece, a focuser, and the mirror support system. The housing compartment for all these elements is not included as part of the kit.

Using such kits to construct your own telescope is graced with numerous advantages. Most of these advantageous highlights are meant for beginners, who can save both time and money with this option. A complete kit allows the builder to save the time that would otherwise be spent searching high and low for the correct components. The average price of a telescope kit is $200 to $300. They can be purchased at hobby centers everywhere, and if you find a discount, the better bargains you will get.

For teachers who need a demonstration to incite the interest of youngsters and get them hooked onto an interesting hobby such as this, telescope kits are a good teaching aid. It is possible to use such a kit for classes in school and demonstrate the whole process to the students. There is no age restriction for this hobby, making it a good hobby for anyone interested in it.

Telescope kits generally are aimed at beginners, amateurs just starting out on their telescope love affair, or at students of the astronomy who intend to pursue a profession in the field someday. To build a telescope using such a kit, you do not need a degree in astronomy or even the experience of an expert. Absolutely any novice is capable of constructing a decent instrument with the instructions given. Manuals that come with the kits, are step-by-step guides, and even have diagrams that explain the methods detailed. Affordably price, and attractively marketed, these kits can pack a pretty powerful telescope and are a lure for any beginner.

It takes only 2-3 days to have an operational, fully functional telescope in your hands after you get your kit. The total work-hours required for it are hardly 15 or 20 from your time. You can work for an hour a day or work a marathon stretch over two days to complete your project. A lazy weekend is the best time to get started. There is never the complication that arises from missing a crucial element during purchase, because these kits always have everything. If you find something damaged, you can have it replaced at the store you bought the kit from. However, it is best to run through the content of the kit and check for quality at the time you make the purchase.

About the Author

Uncover more interesting facts about telescopes as well as getting free hubble space telescope pictures when you visit http://www.howdotelescopeswork.com, the free portal dedicated to telescope making and usage.

Step-by-Step Guide to Increase IQ

How to Explore the Night Sky Without a Telescope

by Will Kalif

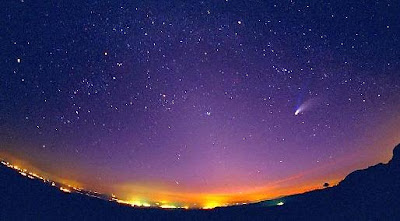
You don't need a telescope to see a lot of wonderful things in the night sky. For example five of the planets are often readily visible with the naked eye. There are lots of amazing things you can see and this guide will help you find them.

To maximize what you can see in the night sky there are a few things you should do as preparation. Of course the first thing you need is a clear and cloudless night. And this includes the moon. You should try to do your observing on a night with no moon; or at the least the smallest sliver of moon possible. Its brightness will wash out many of the dimmest and most dramatic objects in the sky. Second you should consider your comfort. Make sure you dress appropriately for the weather and bring extra layers of clothing if you are observing during cold months. The temperature late in the evening can be substantially lower than it is during the day and because observing the sky means not moving around much you will be even colder. Bring along any items to help your comfort like a lawn chair or a reclining lawn chair so you can look up without craning your neck.

Find yourself a spot to observe from that is as dark as possible. This means get away from street lights, city lights, house lights, or any other type of light source. Ideally you should drive away from any city that is nearby. If this is not possible then try to find the darkest spot you can. Man-made Light sources have an effect on the night sky by washing out the dimmer objects and they have an effect on your eyes by causing your pupils to close. This will decrease your ability to see the dimmer objects.

Beginning your observing is the most critical time for one big reason and this is why a lot of people don't realize how rich the night sky really is. It takes your eyes up to a half an hour to fully adjust to the darkness outside. If you go outside and immediately begin looking for object in the sky you may be disappointed but this is because your eyes haven't adjusted yet! Give it some time and let your eyes fully adjust and you will be amazed at how many more things you see in just a half hour time.

Equipment and stuff to bring along

Get some star maps, planet charts, and reference materials and bring them right outside with you. They will help you to find various objects. But it will be dark outside so you won't be able to read them! And if you turn on some kind of a light or flashlight your night vision will be ruined. But there is a way to read your charts and materials without ruining your night vision. Cover your flashlight with some type of red cellophane or tape so it only gives off a dim red glow. The reduction in light will have less of an effect on your viewing and your eyes are very insensitive to red light so your pupils will not dilate. You can buy flashlights with red covers online, at astronomy and optical shops, or even at military surplus stores.

Suggested Materials List: * Lawn Chair or Reclining Chair * Constellation Chart * Planetary Chart * Lunar Chart * Plenty of Warm clothing * Flashlight covered with red cellophane * Snacks and hot beverages

Things to See

The first place you can start with is the moon (If it is out). And the best viewing will be when it is only a think crescent. This is because when it is like this the sun is casting light on it at a very sharp angle and the surface features will cast long shadows which makes them easier to see. With a full or near full moon the light hits the surface of the moon directly and casts no shadows.

The Milky Way Galaxy - Our solar system is part of a tremendous spiral galaxy called the Milky Way galaxy. You can see this galaxy as a band of diffuse light that stretches across the sky. It takes dark skies and well adjusted night vision to see it but it is quite a remarkable sight. Every star and constellation map will show you where the milky way stretches across the sky.

The Constellations - Finding and identifying various constellations can be a lot of fun. Each constellation represents an object, animal, or historic figure; and learning the story behind them can also be a lot of fun. Identifying constellations is also the only way to go deeper and find other objects like planets and comets. They form the background that everything moves within and they give you a frame of reference for finding these objects. Identifying constellations should be part of every star gazing event you undertake.

The Planets - The planets move around in the sky quite a bit and sometimes they are too close to the position of the sun which means they are not visible at night but five of the planets, when in the right position are easily visible with the naked eye. These are Mercury, Venus, Mars, Jupiter and Saturn. And often times these planets are the brightest objects in the sky. Refer to you planet charts to find current locations of them. One rule of thumb for figuring out whether something is a star or a planet is whether or not it twinkles. Stars twinkle and planets do not. So if you locate an object that you believe is a planet you can watch it for several minutes to see if it twinkles like other stars. If it does not then chances are good you have found a planet.

Colorful Stars - Stars are not all white. This is a common misunderstanding that people have. Stars come in a wide variety of brilliant colors and some of the more notable ones are the bright red Betelgeuse in Orion, the bright light-blue Rigel in Orion, the yellowish-white Altair in Aquila, and the bright red Antares in Scorpio. Finding and identifying these colorful stars can be a lot of fun. It can also be quite easy because some of the brightest stars in the sky are also very colorful from white to blue and red.

Some Objects of Particular Note

There are two very unique objects that are very easily seen with the naked eye on a dark night in the northern hemisphere. These are the Andromeda galaxy and the Hercules Nebula. They appear as tiny wisps of white smoke that look like small cotton balls. Once you start getting familiar with the constellations you should look for these two objects. The Andromeda galaxy is in the constellation Andromeda and the Hercules nebula is in the constellation Hercules.

Periodic and Occasional Objects

The night sky is filled with a lot of objects that come and go in different patterns. Some of them, like meteor showers, occur at around the same time every year. This is when the Earth passes through clouds of space debris. You can check a chart of meteor showers and plan an evening or several evening of watching them. Some meteor showers can give as many as 120 falling stars every hour.

Comets - These can be difficult to view because they are often very dim. But occasionally a comet will become very bright and be easily visible with the naked eye.

The night sky is more than just the moon and the stars. It is a extraordinarily rich environment with objects of all kinds. And given a little bit of time and dark skies you will discover and explore many of the beautiful secrets that it holds; and you can do it without a telescope. All you need is dark skies, a few charts, and a little bit of time.

About the Author

Learn More about the wonders of the night sky at the authors website: TelescopeNerd.com

Step-by-Step Guide to Increase IQ

Wednesday, July 30, 2008

How Do Telescopes Work - Amateur's guide to Telescope-making

by John B. Mayall

When Galileo made his telescope, he was far from the expert he became later. He was just a layman, who found the sky and its stars fascinating and wanted a device that would take him closer to the object of his fascination. It was this desire that led him o devise the first ever telescope that changed the face of history in more ways than we can imagine.

In today's age, a person is able to buy a telescope, readymade, from the market. But for one who is not experienced, constructing a telescope is akin to an adventure. Although the procedure is complex and technical, and quite long, it is quite possible to make a telescope for oneself, by oneself. For the amateur who holds a keen interest in the telescope and the way it works, constructing it by oneself can be quite adventurous and fulfilling.

The construction itself is not very difficult, and it is made easier if one can enlist the assistance of another person who has himself constructed telescopes earlier. Even someone who is an amateur astronomer would make a good mentor, if it's no possible to find one experience in telescope construction. Astronomy clubs generally have at least one member who has prior experience of building telescopes, and such people are quite accommodating towards amateurs.

For an amateur, telescope construction can be a cumbersome task. Patience and calm are advisable for a first-timer. The greatest inventions of all time came from blind experiments and unexpected results. When starting out, it is always best to have some references and manuals handy, as they can explain the technical aspects in the clearest ways. A local library is a good source for material to an amateur just starting out in telescope building.

The basic elements of a telescope are the mirror, two lenses, the housing for the whole structure, and materials that will be used for polishing the mirror. These parts can all be bought at local stores or even online. The mirror can be ground at home as well, but is a tiresome process.

The construction of a telescope is a long and drawn out process. Careful planning is required to ensure that there is minimal cleaning up left after all the work is completed. Is advisable to lay out newspapers to ensure clean work as well as to ensure correct placement of all the equipment. Maintain a logbook if possible to keep track of the task completed and the duration of each task. In later stages, the logbook is a good record to refer to understand the tasks completed and how long each task required. Also, it helps one to remember what work has been completed and what remains.

Once the construction is complete, it is quite natural for the amateur to be pleased with himself for the work he has accomplished. It is however, easier to buy a telescope kit from the market instead of purchasing individual component and constructing the whole structure. Assembling a telescope from a kit is easier, takes less time and is a better financial option. Such telescope kits are intended for the amateurs, and not directed at the professionals.

About the Author

Get free lessons on how to build a telescope as well as professional advice on how to buy a telescope when you visit http://www.howdotelescopeswork.com, the premier portal on how to use telescopes.

Step-by-Step Guide to Increase IQ

Friday, July 18, 2008

Choose a Good Beginners Telescope - Cut Through the Information Overload

by Aidan James

So you've been bitten by the astronomy bug and want to get started with your very own telescope, but you're confused by the vast number of possible purchases? You are not alone, astronomy stores are accustomed to dealing with the confused beginner though of course not everybody has the opportunity to visit a specialist store. This article is intended to help cut through some of the confusion.

It's important to choose a telescope that is right for you, for example there is no point having a great big Dobsonian if you rarely get the chance to assemble it in a good dark sky location.

There are several factors to be considered from practical considerations like size, weight and portability to the price you can afford and indeed where you'll be doing the majority of your observing. Ignoring more advanced uses like astrophotography we might think along the following lines.

As a general rule, the larger the aperture the more you can expect out of your telescope. Refractors will generally outperform similar size reflectors. Refractors however are more expensive than reflectors, due to the extra high quality glass involved. They can also be impractical to handle at larger apertures where they can also reach very long tube lengths.

Large aperture reflectors can have comparatively short tubes and be very easy to handle as well as inexpensive. There is a little extra maintenance involved as you may need to clean and align the mirror from time to time, this procedure is known as collimation.

Catadioptric telescopes are a combination of refractor and reflector and are quite portable even at large apertures. A great many amateur astronomers who have access to good dark sky sites, ultimately end up with catadioptric telescopes because the offer a range of possibilities including astrophotography. The large ones, like most large aperture scopes, are not ideal in light polluted areas like the city and suburbs.

Those big Dobsonian telescopes are really just big reflectors mounted on simple turntables and their attraction is their huge light capture and simplicity of use, making them ideal for visual astronomy in a good location (again they are not so good in light polluted areas).

If you do not relish the thought of learning to find your way around the skies you could consider purchasing one of the models that come with a computerized mount. These 'Go-To' telescopes have made finding targets a breeze.

With those facts in mind you can now think about where you are going to do the most observing and choose a suitable beginners telescope. If you live in the city and are unlikely to get to a rural location for observing then perhaps stick with the small to medium size refractors, reflectors or catadioptrics, with or without the go-to function, your budget will probably start to dictate the choices here! If on the other hand you live in a dark sky area then my recommendation is to buy a great big Dobsonian. These offer so much viewing pleasure and are so simple to use it is difficult to fault them.

About the Author

See my Squidoo page for more on how to choose a good beginners telescope and some specific recommendations and absolute bargains! Telescopes for Beginners, a site helping others get a start in astronomy. Telescopes for Beginners

Step-by-Step Guide to Increase IQ

Monday, July 14, 2008

Binoculars For Astronomy - Know the Basics

by Aidan James

If you like to look to the heavens even just occasionally get yourself some decent binoculars and indulge in a little binocular astronomy. Think about it, binoculars are inexpensive, highly portable and require no complicated setting up procedure so are ideal for casual astronomy.

Binoculars allow excellent moon views, and great viewing of star fields, comets and even deep sky objects. They are especially useful for beginners as unlike astronomy telescopes they keep the view the the right way up, making it really easy to navigate the skies. With a little practice you can pick out several of the planets and even the larger moons orbiting Jupiter. Clusters like Pleiades look great because the binoculars wide field of view lets you have more of the cluster in view at one time than a telescope would.

So how to choose which ones? Binoculars have two specifications marked on the body of the binocular in the form of 7x 50, where the first number represents the magnification (in this case 7 times) and the second the aperture in millimeters (50mm in this case). When it comes to selecting the right binoculars for astronomy, aperture is the most important feature to think about. The bigger the aperture the more light is captured so the brighter and clearer the image will be. For astronomy use you will need at least 40mm aperture and preferably larger.

You will need a magnification factor of at least 7, maybe up to 10 if you have a steady hand. Any higher than about 10 times magnification and you will need to mount your binoculars on a tripod as the hand shake effect makes it difficult to get a sharp image.

There are giant binoculars available with higher magnifications and apertures which are designed for astronomy use but you will certainly need a sturdy tripod or mount to use them. These can offer excellent viewing up to about 25 times magnification with 100mm apertures.

This brings us to another point, a specification known as the 'exit pupil'. This specification refers to the diameter of the shaft of light that exits the eyepieces and into your eyes. You can easily calculate it by dividing the aperture by the magnification so that 7 x 50 binocular has an exit pupil of just over 7mm. Capturing as much of that as possible is good as it means all the available light is getting to where you want it, i.e.your eye. If you are still in your twenties you can probably use all of that 7mm exit pupil mentioned above as your pupils will dilate to about that size in very dark conditions, however as you get older your pupil does not dilate more than about 4 to 5 mm so large exit pupils are wasted (though it starts to make those 25x 100's look good!).

You might notice another specification marked on the binocular, the field of view (FOV), it refers to the apparent side to side view as you look through the binoculars. It will be expressed as an angle in degrees or a measure such as 340 feet at 1000 yards. For astronomy use we can generally ignore that factor, it really does not matter a great deal at the distances we'll be viewing at.

So now you have the basics why not get yourself some binoculars and indulge in a little casual astronomy, you'll be rewarded with some wonderful sights!

Step-by-Step Guide to Increase IQ

Galileo's Telescope

Galileo Galilee used a basic version of the telescopes that are used widely today. Galileo used a refracting telescope and used two lenses, a concave and a convex lens inside a tube. Convex lenses have edges that curve inwards. That's what the typical magnifying glass uses. Concave lenses, on the other hand, have lenses that curve outward. Some believe that the spy glasses, which were invented earlier and made popular around the same time, inspired Galileo to make his own telescopes.

When the convex and concave lenses are combined together, they are able to magnify distant objects. This is the main principle behind the refracting telescope. These lenses gather and focus light at a point. When light that is collected bends and forms images, refraction takes place.

Galileo used his telescope to view the moon and planets like Jupiter and observe them in detail. Although the images were not sharp, he still was able to draw the moon with its craters. To improve the optical quality of his telescopes, he made his own lenses and was able to achieve a magnification of 9x using them in his telescopes. Today, variations of refracting telescopes exist. The special combination of lenses now make it possible to use a short tube for refracting telescopes. Telescopes have come a long way since Galileo.

Cheap Visitors is for your web business. Discover more.

Sunday, July 13, 2008

All About The Stars

by Dave Clark

We all love gazing stars in the sky but do we know as to what are these stars made up of and how they are born. Well, there are lot many questions surrounding the stars. So, let us begin with their formation. Stars are basically made up of plasma. Nebula is a term often used in this regard. It basically refers to the assemblage of dust particles and gas and when all these dust particles and gases get together, they form a star.

Did you know that sun is also a star? It might appear strange to you, but yes sun is also a star which appears to be bigger than rest of the stars but is actually smaller in comparison to others. Not only that, it also has a much less quantity of mass as compared to others. This is the reason why it has been able to survive for so long. After knowing this fact, you must have come to know that mass of the star is inversely related to its life cycle; the more the mass a star has, the lesser will be its life span and vice versa.

Let us now discuss the life cycle of a small star of about one solar mass. It passes through different stages of life. As mentioned before, when nebula is available in high density, it leads to the formation of a star. After that, it condenses to form a huge blob of gas and ultimately contracts under its own gravitational force. As the star becomes hot, it glows in the sky and transforms into a protostar. If it has adequate substance, it attains a very high temperature of 15 million degrees centigrade. At this heat level, nuclear reactions take place, thereby causing fusion of hydrogen. This in turn gives rise to helium. At this stage, the star starts releasing energy and shines all the more. It is now called the main sequence star.

A small star stays into the main sequence stage till the entire hydrogen converts into helium. In the next stage, the helium core begins to shrink. When the core becomes extremely hot, it causes fusion of helium to form carbon. This leads to the expansion of its outer layer. After some time, it becomes cool and glows. The expanded star is popularly called red giant. After a certain period, the helium core vanishes and its outer layer goes away from the star in the form of a gaseous shell. The left core turns into a white dwarf and fades away. Then a stage comes when the star stops glowing and is called a black dwarf. So, this is the life cycle of a star.

About the Author

Dave Clark is a freelance article writer and has been in the industry for many years, he has written many books and is very knowledgeable in various fields, Dave also works for Cushy Sofa a supplier of memory foam mattresses, sofas and Divan sets.

Step-by-Step Guide to Increase IQ

Astro Science Workshop Launched

Read and learn about astronomy science stuff.

Step-by-Step Guide to Increase IQ